Step-by-Step Guide to Configuring Windows Firewall Ports

Step-by-Step Guide to Configuring Windows Firewall Ports
Quick Links
Key Takeaways
- Firewalls block unsolicited traffic from the internet by default, but you may need to open a port to allow specific traffic through for programs like game servers.
- To open a port on Windows 10, search for “Windows Firewall” and go to “Windows Defender Firewall.” Click on “Advanced Settings” and create a new inbound rule for the specific port number.
- You can choose when the rule applies (domain, private, public) and give it a name and description. If needed, you can disable the rule or repeat the steps to open ports for different programs.
Firewalls are there to protect you from threats on the internet (both traffic from the internet and from local applications trying to gain access when they shouldn’t). Sometimes, though, you’ll want to allow otherwise restricted traffic through your firewall. To do so, you’ll have to open a port.
What Do Ports Do?
When a device connects to another device on a network (including the internet), it specifies a port number that lets the receiving device know how to handle the traffic. Where an IP address shows traffic how to get to a particular device on a network, the port number lets the receiving device know which program gets that traffic. By default, most unsolicited traffic from the internet is blocked by Windows Firewall. If you’re running something like a game server, you might need to open a port to allow that specific kind of traffic through the firewall.
This article shows you how to open a port on a particular PC’s firewall to let traffic in. If you have a router on your network (which you likely do), you will also need to allow the same traffic through that router by forwarding the port there.
How to Open a Port on Windows 10
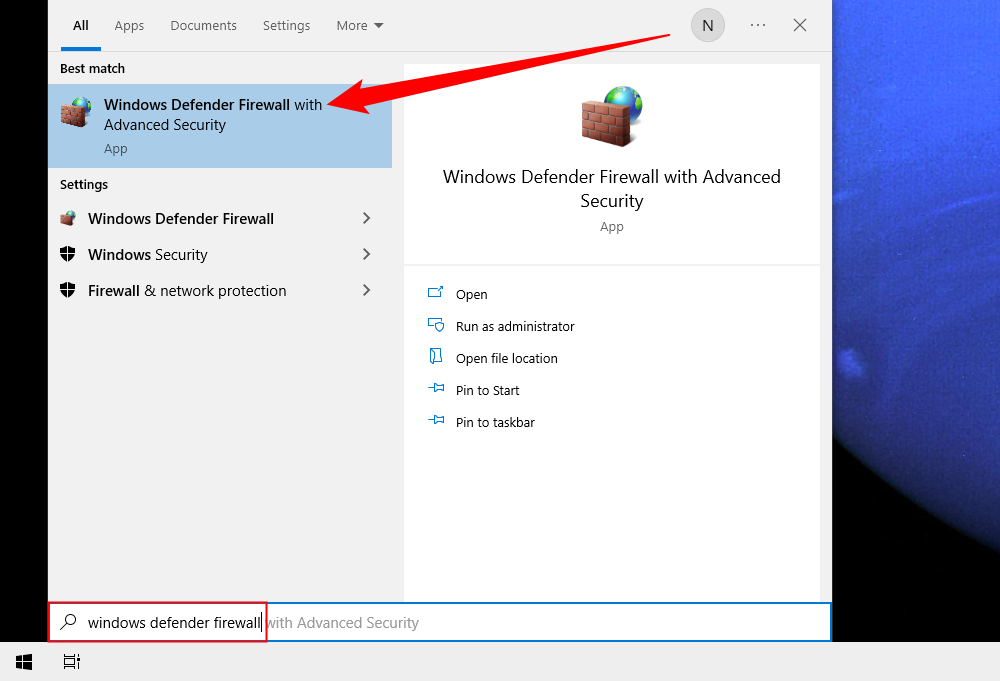
Clicking Start, type “Windows Firewall” into the search box, and then click on “Windows Defender Firewall.”
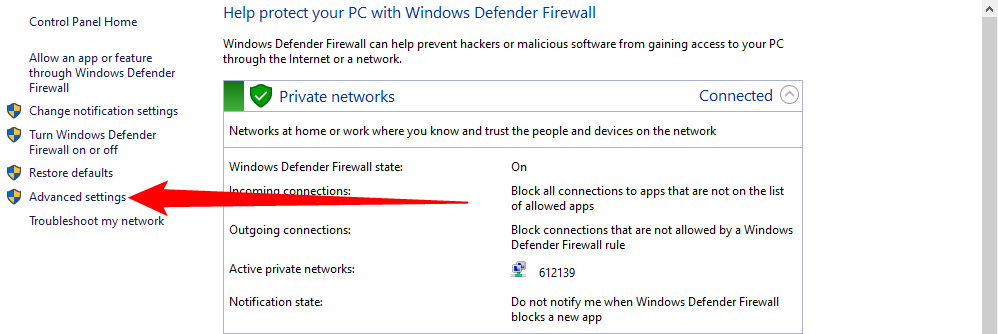
Once Windows Firewall opens, click on “Advanced Settings.”
This launches Windows Defender Firewall with Advanced Security. Click the “Inbound Rules” category on the left. In the far right pane, click the “New Rule” command.

If you need to open a rule for outgoing traffic, instead of clicking “Inbound Rule,” you’d click “Outbound Rule.” Most apps are pretty good about creating their own outbound rules when you install them, but you might occasionally run into one that cannot.

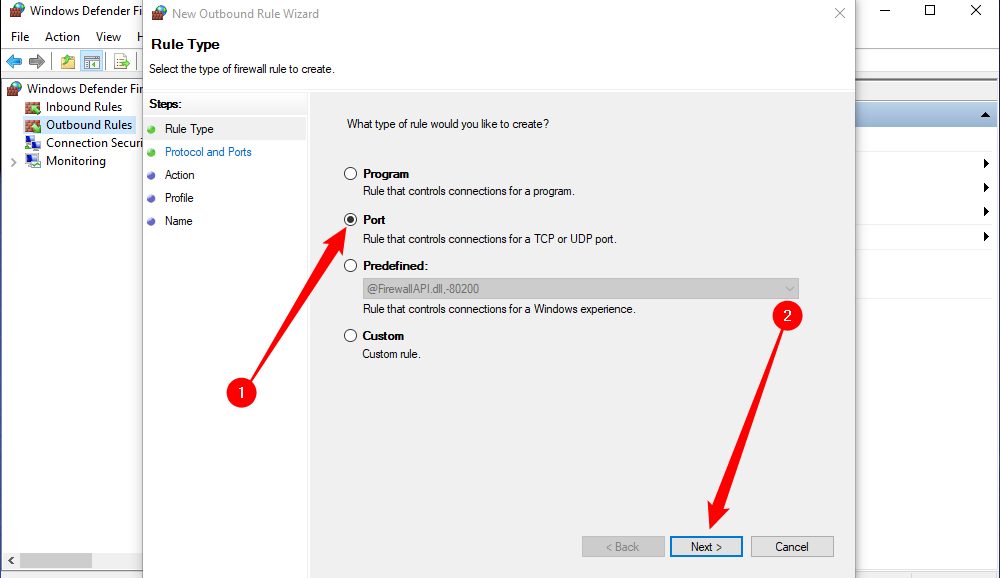
On the Rule Type page, select the “Port” option and then click “Next.”
On the next screen, you’ll have to choose whether the port you’re opening uses the Transmission Control Protocol (TCP) or User Datagram Protocol (UDP). Unfortunately, we can’t tell you specifically which to use because different apps use different protocols. Port numbers can range from 0-65535, with ports up to 1023 being reserved for privileged services. You can find an unofficial list of (most) TCP/UDP ports on the Wikipedia page , and you can also search for the app you’re using. If you can’t determine the specific protocol to use for your app, you can create two new inbound rules — one for TCP and one for UDP.
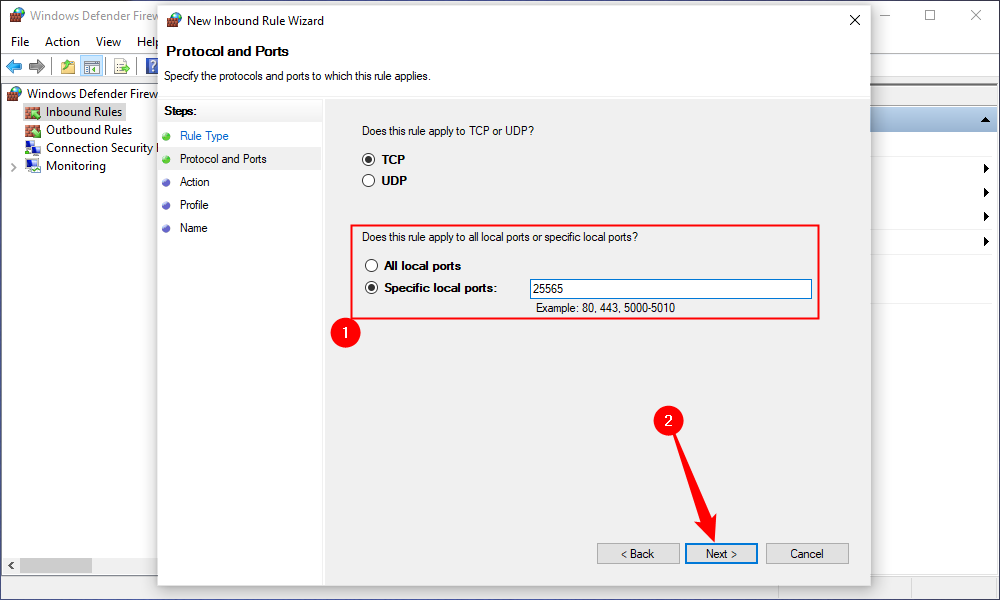
Select the “Specific Local Ports” option and then type the port number into the field provided. If you’re opening more than one port, you can separate them by commas. If you need to open a range of ports, use a hyphen (-).
Click “Next” when you’re done.
On the next page, click “Allow the Connection” and then click “Next.”
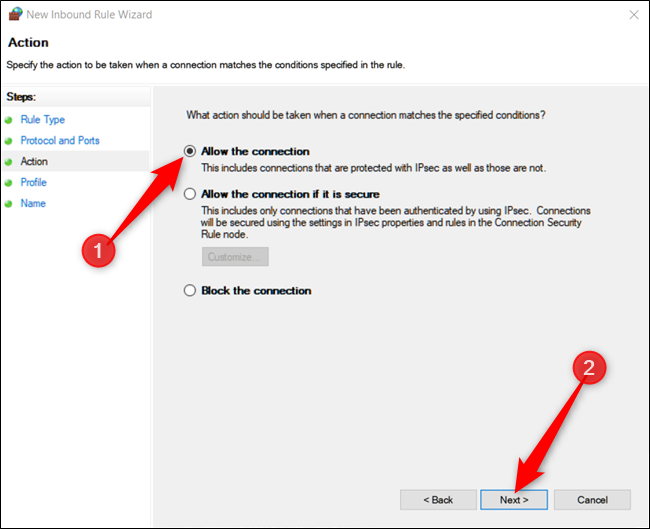
For this guide, we’ll be using the “Allow the Connection” option, as we trust the connection for which we’re creating a rule. If you want a little more piece of mind, the “Allow the connection if it is secure” rule uses Internet Protocol security (IPsec) to authenticate the connection. You can try that option, but many apps do not support it. If you try the more secure option and it doesn’t work, you can always come back and change to the less secure one.
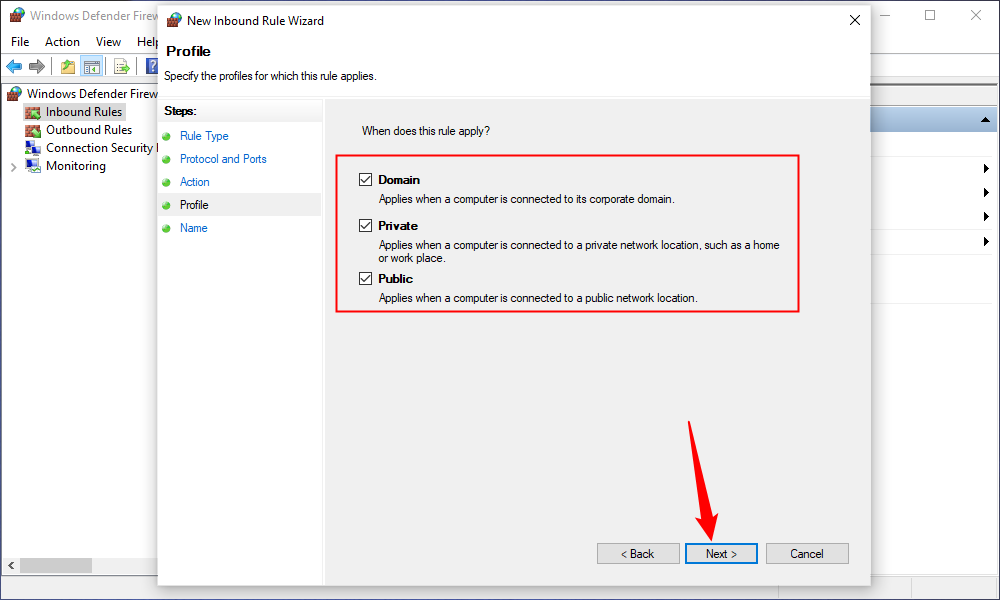
Next, choose when the rule applies and click “Next.” You can choose one or all of the following:
- Domain: When a PC is connected to a domain controller that Windows can authenticate access to the domain.
- Private: When a PC is connected to a private network, like a home network or a network that you trust.
- Public: When a PC is connected to an open network, like a cafe, airport, or library where anyone can join, and the security is unknown to you.
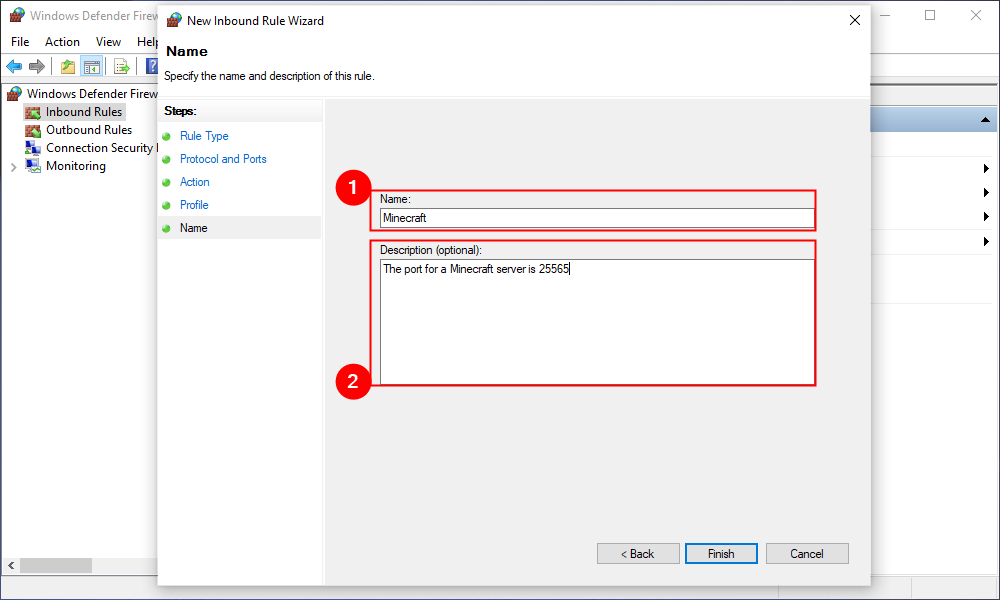
In the final window, give your new rule a name and an optional, more detailed description. Click “Finish” when you’re done.
If you want to disable the rule at any point, locate it in the list of Inbound or Outbound Rules, right-click it, and then click “Disable Rule.”

That’s all there is to it. If you need to open any other ports for a different program or with a different rule, repeat the steps above using a different set of ports to open.
Also read:
- [New] Unlocking FreenoCam's Webcam Capturing Capabilities for 2024
- [New] Unveiling Color Depth Why HDRI Is Preferable in Media Production
- [Updated] The Ultimate Handbook to Drone Video Editing
- [Updated] Top 5 Innovative VR Drones Collaborations
- [Updated] Visual Prodigies Top 4K Monitors for Cutting-Edge Work
- 2024 Approved Tailoring Your Podcast Content with SEO in Mind
- 2024 Approved The Key Ingredients for Successful Instagram Unboxing Reels
- Effortless HP ZBook 15 G3 Driver Setup on Windows PCs
- Ending Facial ID at Meta, But Why? Uncover The Story.
- H501X4 FPV Quadcopter Unveiled - Review Breakdown for 2024
- Quick Fixes for Green Screen Glitches on Mac Video Editing Platform for 2024
- Using PS5 DualSense on an Older Console?
- Vocal Voyages Selecting the Perfect Tune for Podcast Openings
- Title: Step-by-Step Guide to Configuring Windows Firewall Ports
- Author: Mark
- Created at : 2024-12-20 01:12:55
- Updated at : 2024-12-24 16:18:04
- Link: https://some-guidance.techidaily.com/step-by-step-guide-to-configuring-windows-firewall-ports/
- License: This work is licensed under CC BY-NC-SA 4.0.