In 2024, Tailoring Photos with Photoshop's Dynamic Motion Blur Feature
Tailoring Photos with Photoshop’s Dynamic Motion Blur Feature
Many photographers like to add motion blur effects in their still images to create a dramatic look. If you have taken still images of architectural structures, adding motion blur can give a cinematic effect efficiently. There are various photo editing tools through which you can create motion blur effects; however, Photoshop produces the best results.
Through this article, you will learn the simple technique of creating motion blur in Photoshop proficiently. Moreover, we will introduce an alternative to Photoshop that can also acquire flawless results in creating motion blur.

Part 1: What is a Motion Blur Effect?
Motion blur is created on photos to increase the aesthetic element of photography. This effect instantly adds a depth of field to photos that also grasps the attention of viewers. You can create motion blur in your photos efficiently by moving the camera during exposure. Moreover, if the subject is moving during the exposure, it will also generate a motion blur flawlessly.
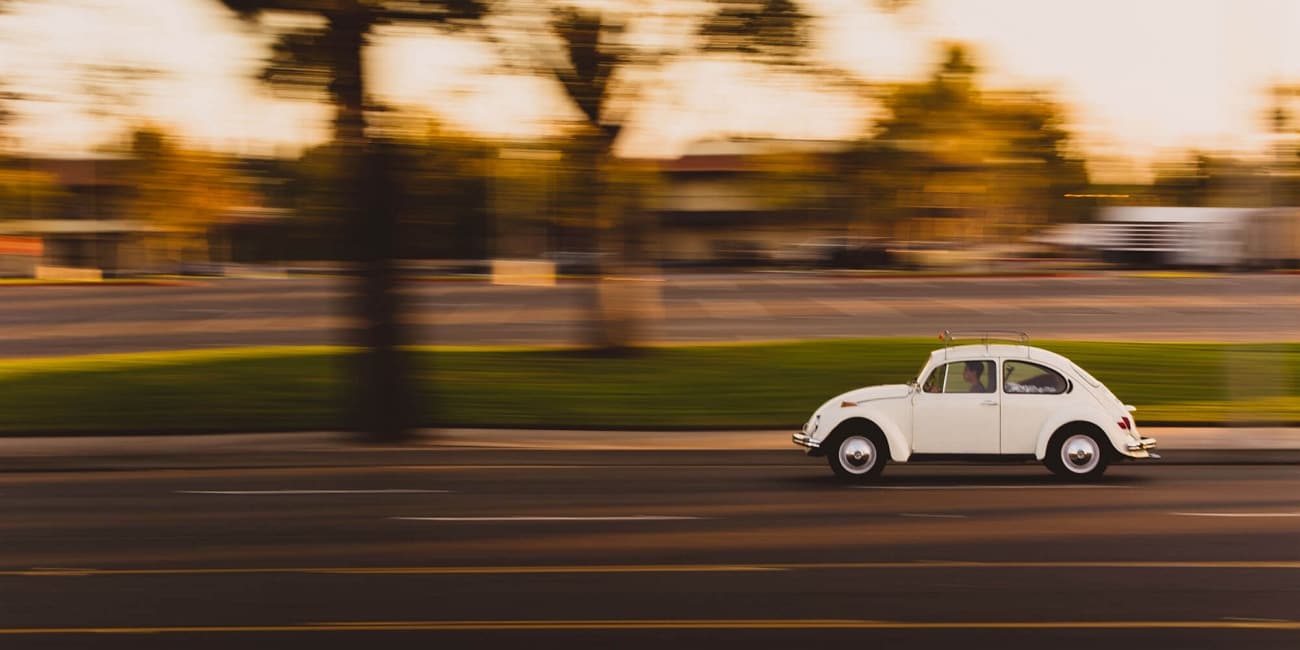
Many professional photographers also create this effect by slowing down the shutter speed of the camera. In this case, using a tripod is necessary to effortlessly create a motion blur effect in still images. The motion blur effect is not only restricted to still images, but it is also added in movies, video games, and 3D renders. Thus, it’s one of the commonly used effects which adds a cinematic element to your photos.
 Allavsoft Batch Download Online Videos, Music Offline to MP4, MP3, MOV, etc format
Part 2: How to Add the Motion Blur Effect to Your Photos in Photoshop?
Do you know how to motion blur in Photoshop? Creating a motion blur effect while capturing photos can be tricky and complicated. That’s why many people use professional photo editors like Photoshop to add a motion blur effect to the captured photos. Photoshop has always been considered to be a professional photo editor as it can generate high-quality outputs.
The latest version of Photoshop comprises tons of advanced editing features that can add a new dimension to the pictures. It offers AI-supported neural filters and photo correction tools. Along with a sky replacement feature, it also provides drawing and typography tools. You can also execute layer editing on this tool. Moreover, you can also add a perfect motion blur effect in Photoshop with a few clicks.
Steps to Create a Motion Blur Effect in Photoshop
Are you excited to generate a motion blur effect through Photoshop? Read this section to find out the easy and simple instructions to add a motion blur in Photoshop:
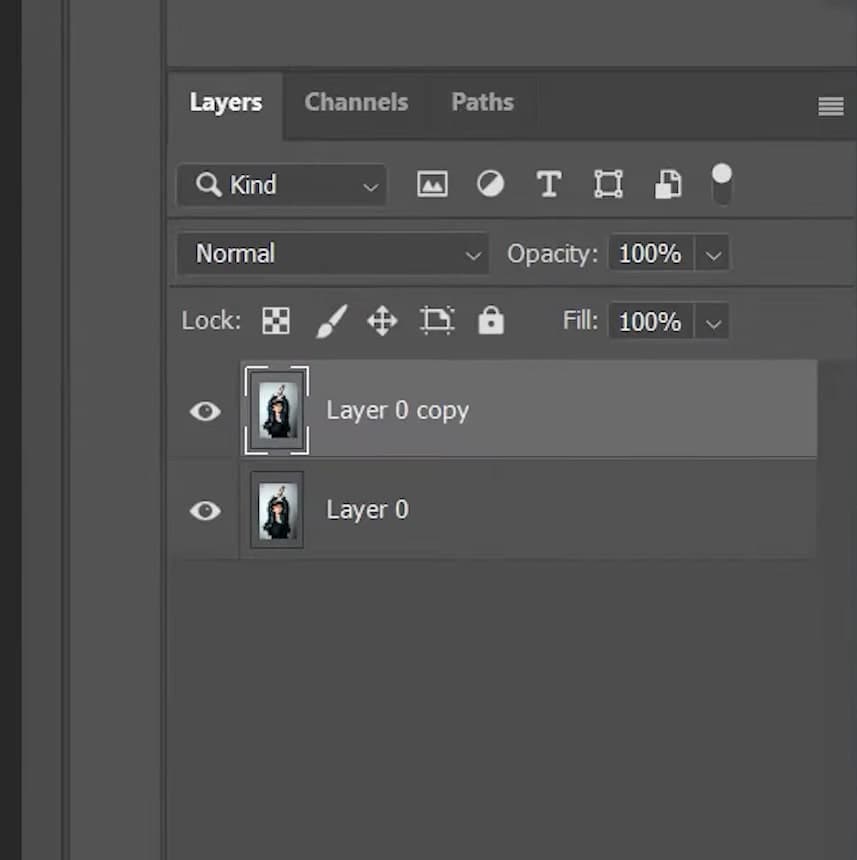
Step1 First, download and install the Photoshop tool on your PC. Upload your picture and navigate to the “Layers” tab. If you are a Windows user, then press “Ctrl + J” to copy the layer. For MacBook, press “Command+ J”.
Step2 Now head to the “Filter” section and locate the option called “Blur.” From the drop-down menu, select “Radial Blur.” From the new window, adjust the amount to 10 and choose “Spin” in the “Blur Method” section.

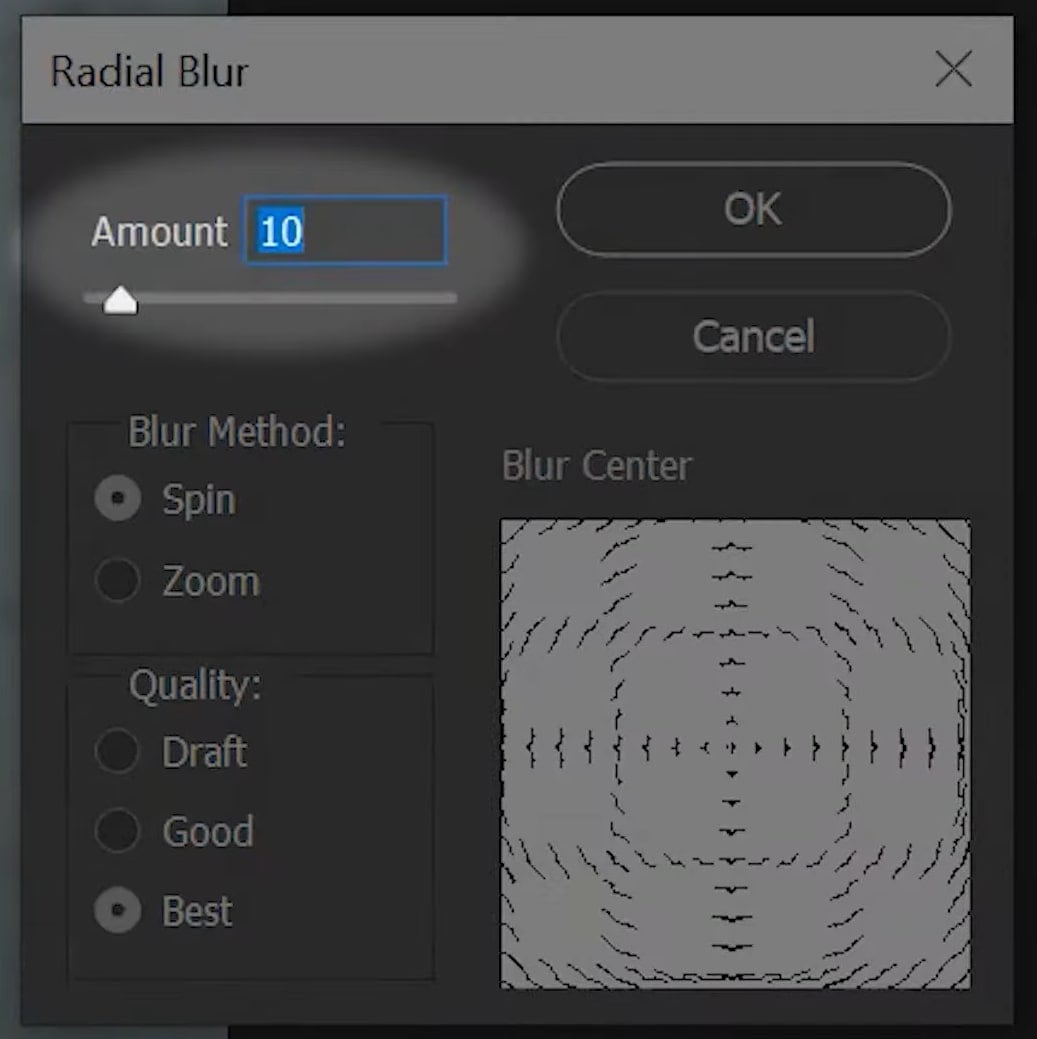
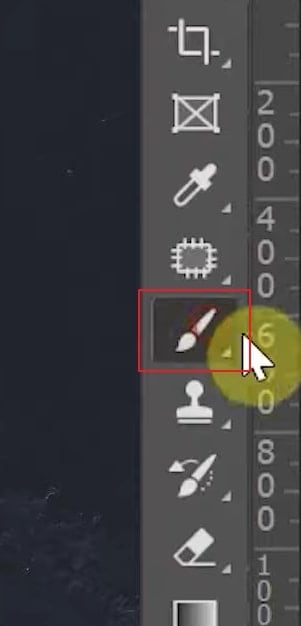
Step3 Under the “Quality” section, select “Best.” Once done, click on the “OK” button. Wait for some time until the changes get saved. Now head back to the Layer section and tap on the “Vector Mask” option given below. Afterward, select the “Brush” tool from the left side.
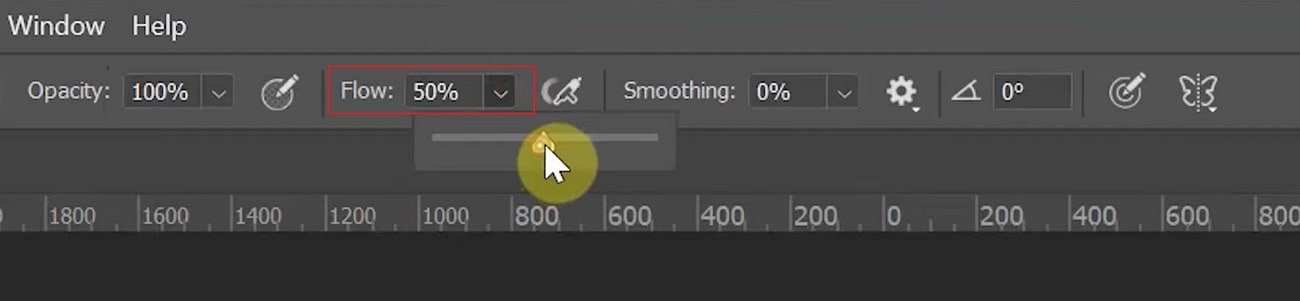
Step4 Now head to the “Flow” option displayed above and decrease the flow percentage to 50. Also, choose a black color for the foreground. Now, using the “Brush,” press on some of the areas of the face to add some depth of field.
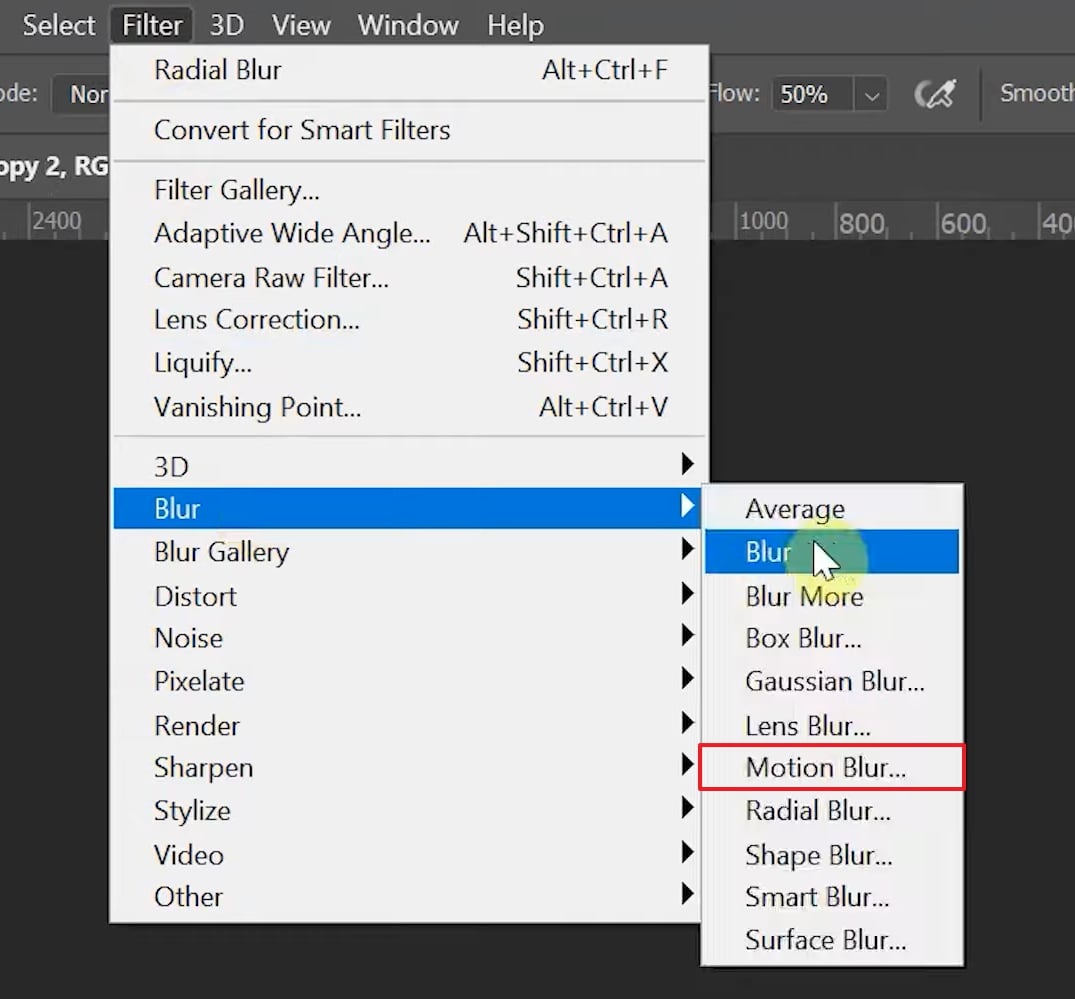
Step5 Head back to the layer section and select the bottom layer. Now copy the layer for the second time by either pressing Ctrl + J or Command + J. Afterward, head to the “Filter” tab and locate the option called “Blur.” From the drop-down menu, tap on “Motion Blur.”
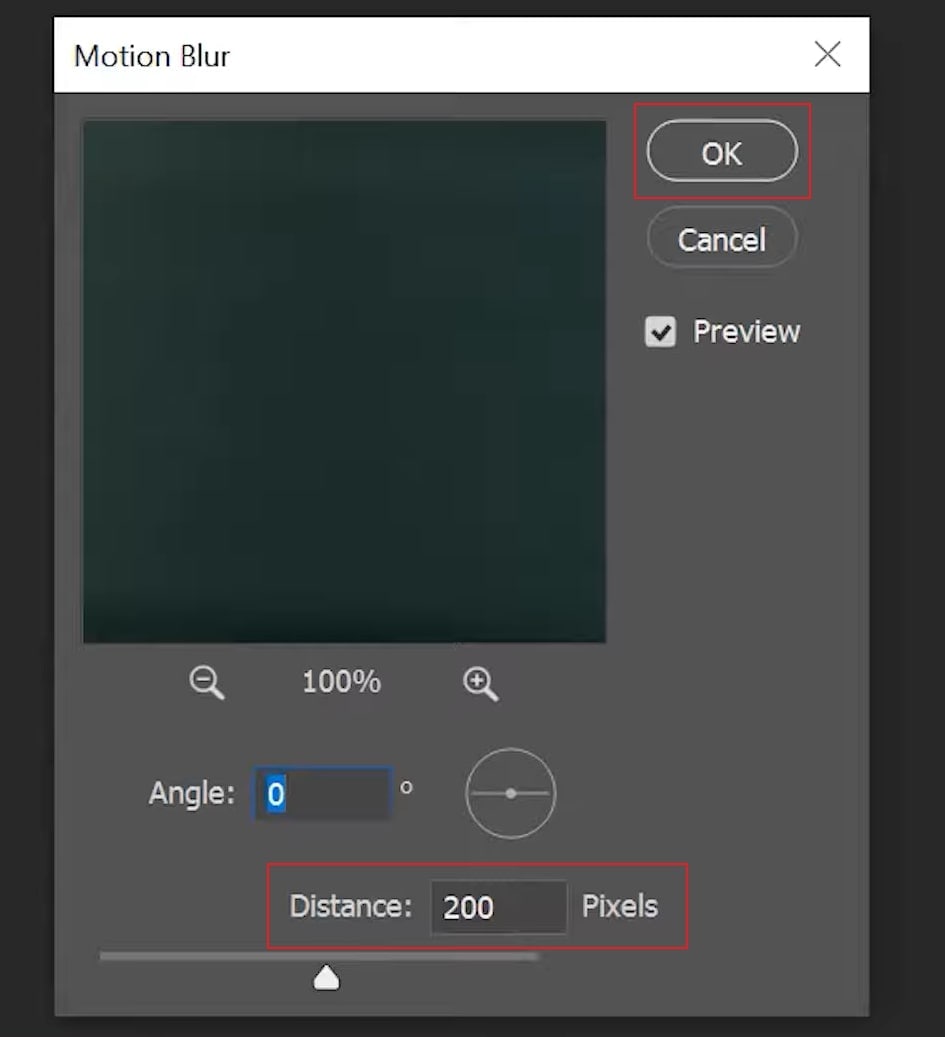
Step6 Now set the angle on the displayed window and adjust the distance to 200 pixels. Once done, press the “OK “button. For this layer, add a mask and execute the dabbing process on the face as we did before. For more modifications, you can add a high-contrast black-and-white effect to your photo.

Bonus Tips – The Alternative to Photoshop to Create Motion Blur Effect
Do you want to simplify the whole process of adding motion blur to photos? The best alternative to Photoshop that you can easily try is Wondershare Filmora . It also functions as a professional tool and provides all the mandatory features to execute photo editing. You can find more than 115 instant modes and preset templates in this tool. Using this tool, you can proficiently add text, effects, and stickers to your photos.
Free Download For Win 7 or later(64-bit)
Free Download For macOS 10.14 or later
To perform advanced editing, it offers features like Green Screen and AI Portrait. Using Filmora, you can also add a motion blur effect to your photos in its intuitive interface. After editing, you can instantly render your clip on this tool. Moreover, you can choose a desired output file format and resolution while exporting your file. Hence, it’s a complete platform to modify and enhance photos in a friendly user interface.
Steps to Add Motion Blur on Wondershare Filmora
Filmora is an efficient and cost-effective tool for video and photo editing. To create a motion blur effect on your photos without seeking any professional help, check the following instructions:
Step 1 Import the Picture
Start by launching Wondershare Filmora on your Windows or macOS device. Next, click on the “Create New Project” option and hit the “Arrow” icon on its main interface. By doing so, you can import the photo from your system.

Step 2 Split the Clip
After importing the picture, drag it to the timeline. Now play the clip on the timeline carefully. Pause the play head where you want to create a motion blur. Tap on the “Scissor” icon on the timeline to split your clip. Perform the same steps on your clip where you want to end the motion blur effect.
 Forex Robotron Gold Package
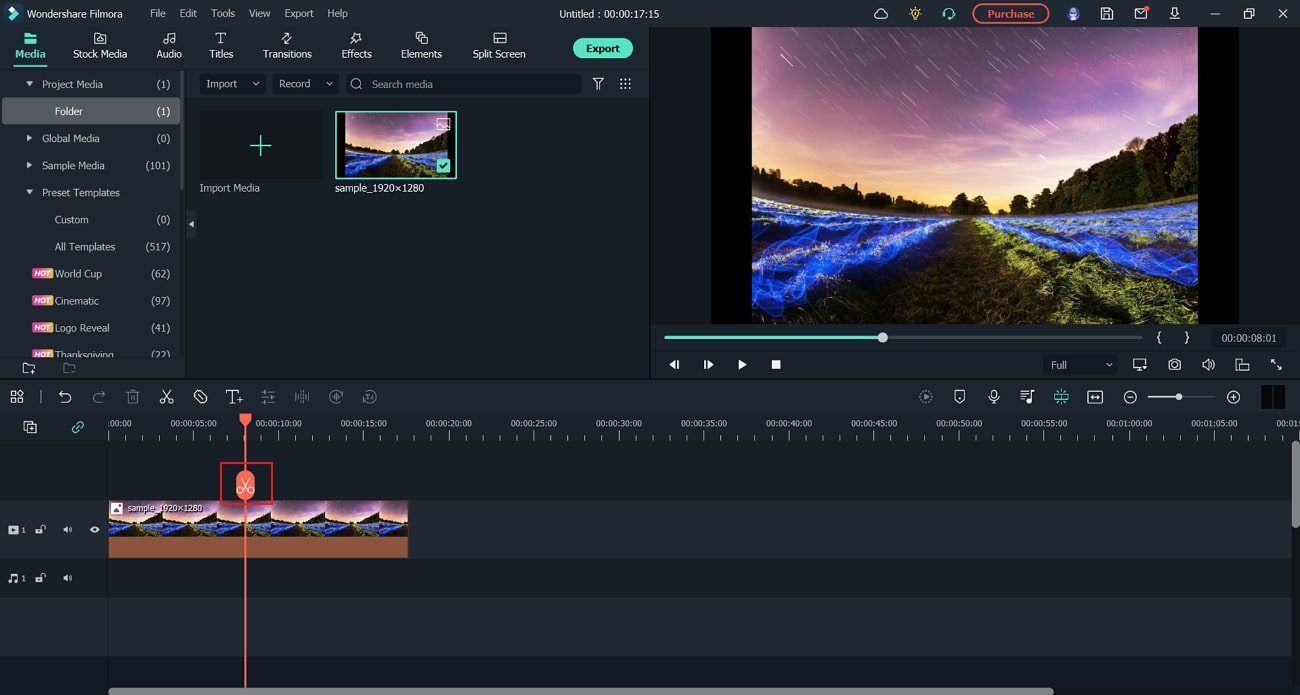
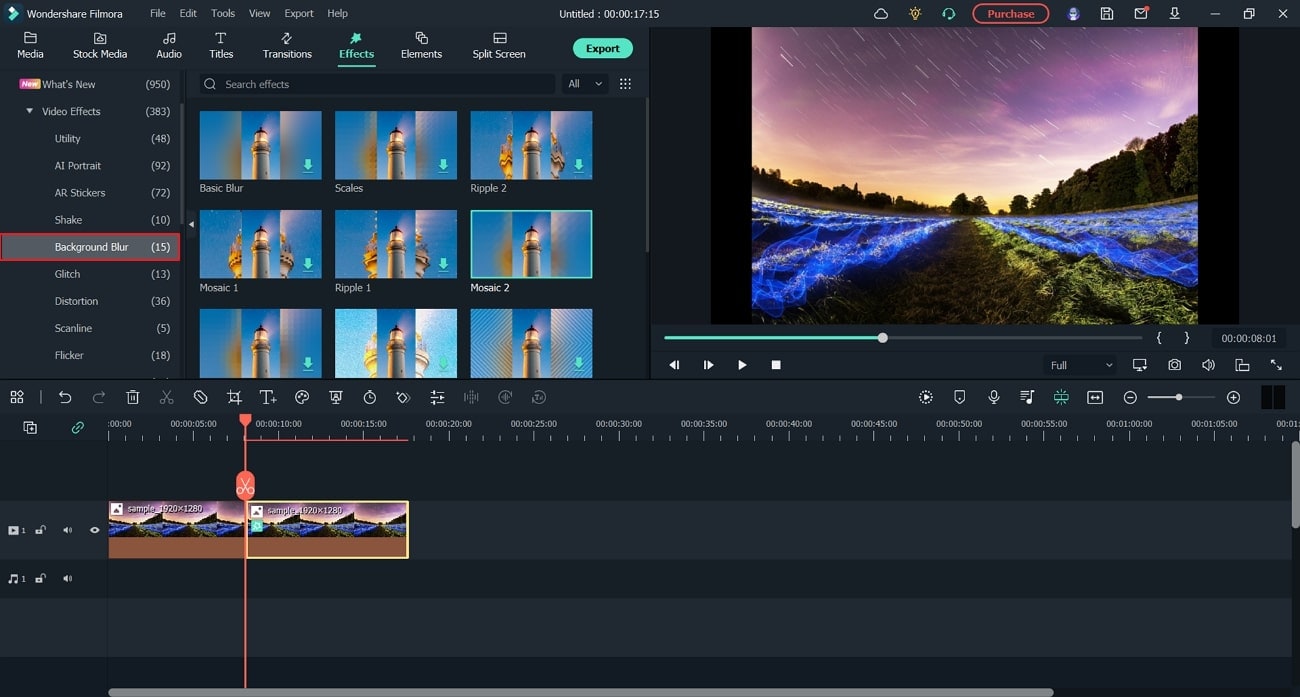
Step 3 Go to the Effects Tab
Navigate to the “Effects” section and locate the “Background Blur” option. Afterward, you would be able to see tons of blur effects. Next, choose your favorite blur effect from the options and apply it to the specific part of your clip on the timeline.

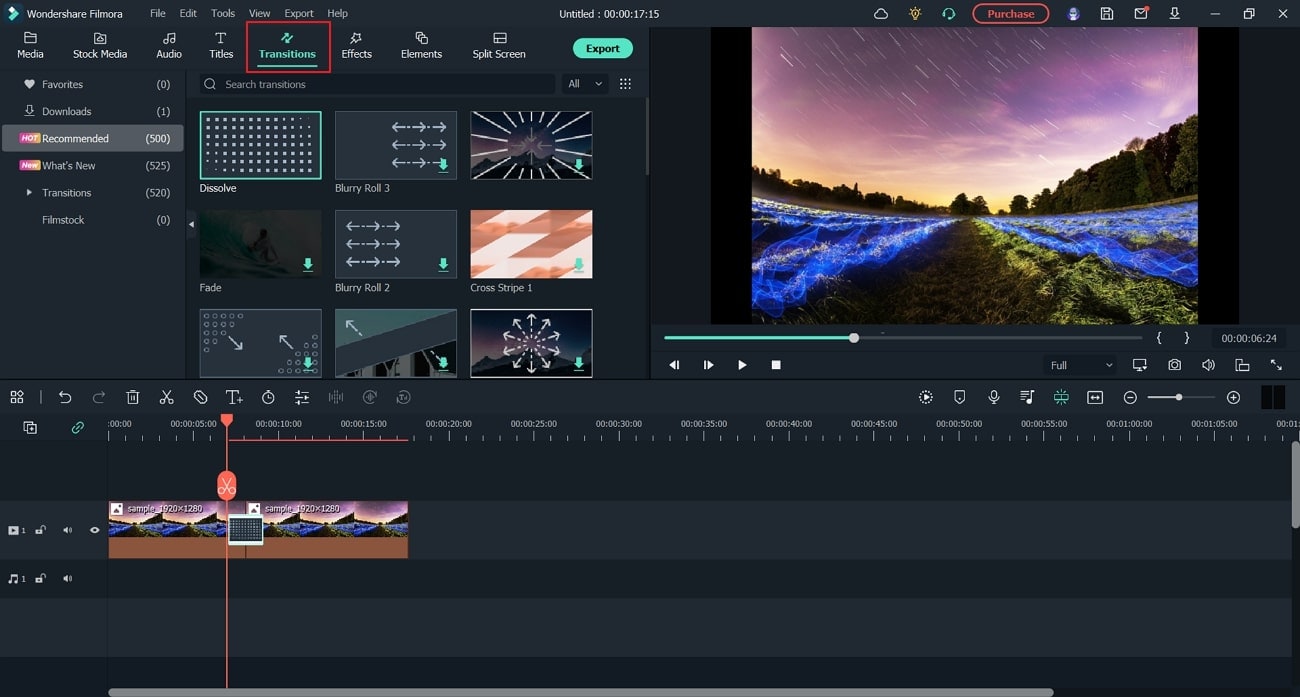
Step 4 Adjust the Parameters
Now play your clip to see the results on your screen. You can adjust its parameters by proceeding to the “Transitions” tab. Here, select the “Dissolve” option. By applying this transition effect, you can quickly make your clip look smooth. For more modifications, you can also adjust the phase increment and zoom rate.
Step 5 Export the Blurred Photo File
Once you are done with editing, access the “Export” setting of Filmora. Choose your preferred resolution and output file format from the given options to conclude.


WPS Office Premium ( File Recovery, Photo Scanning, Convert PDF)–Yearly
Conclusion
Do you want to add an artistic look to your photos? One of the great ways to enhance the visual appeal in still images is by adding a motion blur effect. In this article, we have shed light on how to create motion blur in Photoshop with detailed and easy instructions. Moreover, we have also provided the best alternative to Photoshop called Wondershare Filmora. This tool offers more simple and efficient ways to add motion blur in photos.
- Title: In 2024, Tailoring Photos with Photoshop's Dynamic Motion Blur Feature
- Author: Mark
- Created at : 2024-08-21 22:00:13
- Updated at : 2024-08-22 22:00:13
- Link: https://some-guidance.techidaily.com/in-2024-tailoring-photos-with-photoshops-dynamic-motion-blur-feature/
- License: This work is licensed under CC BY-NC-SA 4.0.