
"2024 Approved The Ultimate Guide to iPhone Composition Choosing Right Angles"
The Ultimate Guide to iPhone Composition: Choosing Right Angles
How to Find the Good iPhone Photography Angles


Ollie Mattison
Mar 27, 2024• Proven solutions
A great photo isn’t defined by the number of pixels it has, but with the unique perspective of a scene, it presents to the viewer. Inexperienced photographers have a tendency to photograph things in their immediate surroundings, but in time they develop their unique ways of finding unusual angles from which they photograph scenes.
In this article, we are going to introduce you to different types of shots that can help you find a perfect angle for each and every of your iPhone photos.
How to Find Perfect Angles for Your iPhone Photos
Learning how to use different shot angles will enable you to take better photos with your iPhone. Let’s have a look at some of the commonly used camera angles in photography as well as some tips that will enable you to improve your iPhone photography skills.
1. Close Ups
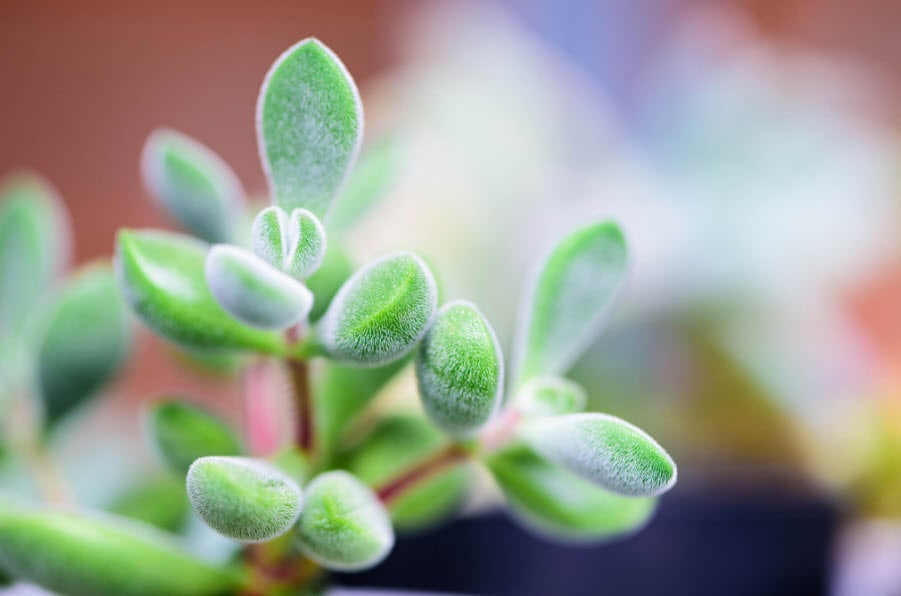
Image resource: Digital Care Solutions
A close up is the type of shot that depicts only a small fraction of a scene or a detail. These shots are frequently used for portraits that show only a portion of a human face or some interesting detail. Furthermore, product photography relies heavily on close-ups because it often depicts fruit, and all sorts of tiny objects, that would be too small to photograph in a wide-angle shot.
There are two different ways in which you can create a close-up. iPhone cameras allow you to zoom in on the subject of your photo, but if the object is too far away, using the zoom may blur and ruin the photo completely. The alternative is to get as close as possible to the object you want to take the picture of, because you won’t have to rely too much on the zoom features and you’ll be able to separate the subject of the photo from its background.
2. Low-Angle Shots
 Glarysoft File Recovery Pro Annually - Helps to recover your lost file/data, even permanently deleted data.
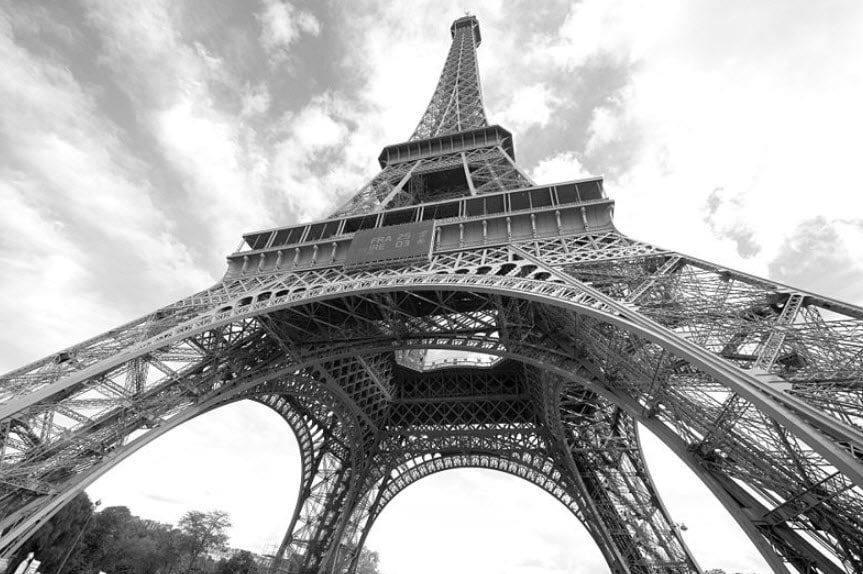
Image resource: google
Even though we often don’t think about it, our field of vision strongly influences the way we think about pictures. The most common way to take a photo is to place the camera at the height of your eye level, and for that reason, any camera position that is located below this point is considered a low-angle shot.
This type of shot is frequently used in nearly all niches of photography, but it is best suited for portraits and street or architecture photography. Low angle shot makes figures and objects in your photos look bigger than they really are, which often has a strong impression on the viewer.
3. Straight Up - Take Pictures of things above you

Image resource: Digital Photography Review
Raising your head up from time to time to see what is directly above you, may not be such a bad idea for any aspiring iPhone photographer because it will enable you to snap a photo from a unique perspective. Forests, skyscrapers or starry skies are all perfect scenery for straight up shots, however, if the scene doesn’t have enough light try to avoid holding your iPhone in your hand, because you might end up with a blurry picture.
Straight up shots require a lot of attention to picture composition since they provide numerous ways to use basic and advanced image composition techniques. The greatest downside of straight up shots is that they are largely dependent on the immediate surroundings of a photographer.
4. Shoot from the height of your hip
Holding your iPhone at the height of your hip is another simple and effective way to find an angle that offers a unique perspective of the scene. Shooting from the hip is especially useful if you want to use your iPhone for Street photography because it makes the act of taking a photo much less obvious. Spontaneity is probably the most important aspect of street photography, and if nobody realizes you are taking pictures, the photos will look more candid.
Framing might a bit more complicated since you can’t really look at your display while you are taking a picture but if you use this type of a shot frequently your ability to create perfectly framed photos without even looking will improve significantly.
5. Bird’s Eye View
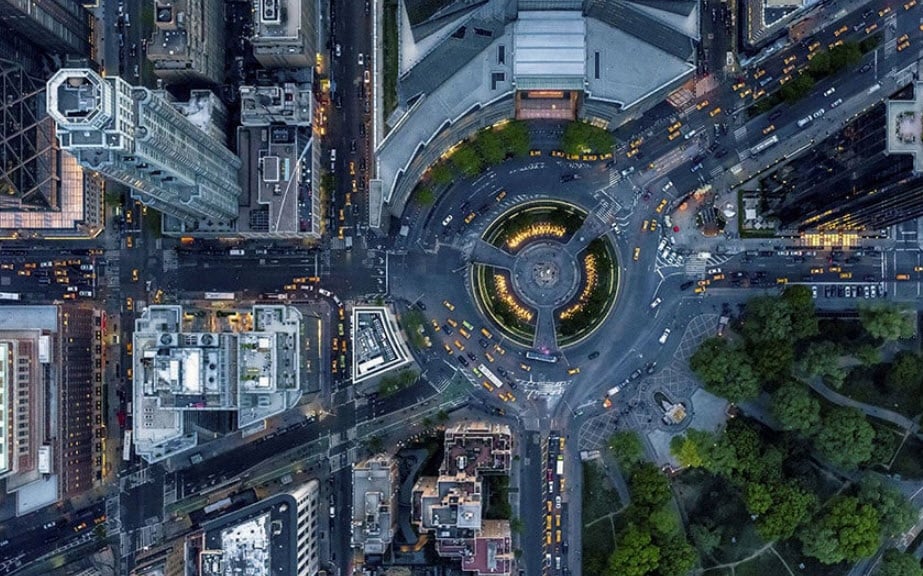
Image resource: Google
Looking down on a beautiful view impresses everyone, but putting yourself in a position to watch the world from a top of a mountain or even a building requires a certain level of preparation. However, a bird’s eye view angle can be captured on any location, and you just need to place yourself above the subject of your photo. This type of shot can be used for portraits, areal shots, and even breathtaking landscapes, but all objects depicted in bird’s eye view photos will appear smaller than they actually are.
Stairwells or even chairs can be used to take a high vantage point, but you must also make sure that your iPhone is perfectly stable and avoid camera shakes at any cost.
6. Use a Frame Within a Frame
 NeoDownloader - Fast and fully automatic image/video/music downloader.

Image resource: Chris Utano Photography
All photos have a rectangular shape, and depicting the same shape within a photo creates instant dynamics between the shape you captured in a photo and its literal shape. A frame can be literally anything from a window in your room to a crack in the wall or even an old photo frame, and each item you use as a frame will give the photo a special atmosphere.
Even though frames are an incredibly fun way to create photos, they obstruct the view of the spectator which is why figuring out how to incorporate a frame into the composition of your shot may take some patience and practice.
7. Use Transparent Objects as Lens Filters
 CalendarBudget - Monthly subscription membership to CalendarBudget via web browser or mobile app. Support included.
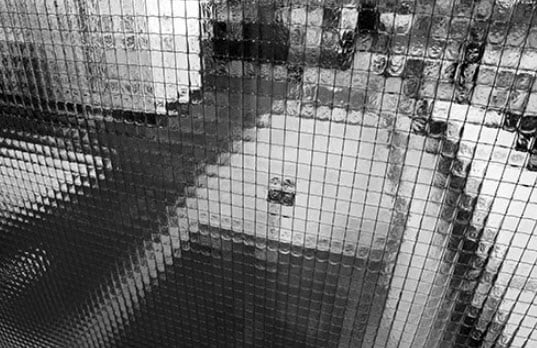
Image resource: Digital Photo Secrets
You don’t have to know anything about camera lens filters in order to use them. Your sunglasses, glasses of water or any other transparent or reflecting surface can be used as a filter through which you take pictures.
If you take a photo through a glass of water you’ll be able to create a distorted image of the view behind the glass. Taking photos through transparent objects can be a lot of fun, but it is often more complicated than it seems. Controlling aperture, exposure or focus manually from your iPhone may help you get better results because you’ll be able to decide where the focal point of the photo will be or fine-tune the amount of light your iPhone camera can pick up.
Ollie Mattison
Ollie Mattison is a writer and a lover of all things video.
Follow @Ollie Mattison
Ollie Mattison
Mar 27, 2024• Proven solutions
A great photo isn’t defined by the number of pixels it has, but with the unique perspective of a scene, it presents to the viewer. Inexperienced photographers have a tendency to photograph things in their immediate surroundings, but in time they develop their unique ways of finding unusual angles from which they photograph scenes.
In this article, we are going to introduce you to different types of shots that can help you find a perfect angle for each and every of your iPhone photos.
How to Find Perfect Angles for Your iPhone Photos
Learning how to use different shot angles will enable you to take better photos with your iPhone. Let’s have a look at some of the commonly used camera angles in photography as well as some tips that will enable you to improve your iPhone photography skills.
1. Close Ups
 EmEditor Professional (Lifetime License, non-store app)
Image resource: Digital Care Solutions
A close up is the type of shot that depicts only a small fraction of a scene or a detail. These shots are frequently used for portraits that show only a portion of a human face or some interesting detail. Furthermore, product photography relies heavily on close-ups because it often depicts fruit, and all sorts of tiny objects, that would be too small to photograph in a wide-angle shot.
There are two different ways in which you can create a close-up. iPhone cameras allow you to zoom in on the subject of your photo, but if the object is too far away, using the zoom may blur and ruin the photo completely. The alternative is to get as close as possible to the object you want to take the picture of, because you won’t have to rely too much on the zoom features and you’ll be able to separate the subject of the photo from its background.
2. Low-Angle Shots
Image resource: google
Even though we often don’t think about it, our field of vision strongly influences the way we think about pictures. The most common way to take a photo is to place the camera at the height of your eye level, and for that reason, any camera position that is located below this point is considered a low-angle shot.
This type of shot is frequently used in nearly all niches of photography, but it is best suited for portraits and street or architecture photography. Low angle shot makes figures and objects in your photos look bigger than they really are, which often has a strong impression on the viewer.
3. Straight Up - Take Pictures of things above you
Image resource: Digital Photography Review
Raising your head up from time to time to see what is directly above you, may not be such a bad idea for any aspiring iPhone photographer because it will enable you to snap a photo from a unique perspective. Forests, skyscrapers or starry skies are all perfect scenery for straight up shots, however, if the scene doesn’t have enough light try to avoid holding your iPhone in your hand, because you might end up with a blurry picture.
Straight up shots require a lot of attention to picture composition since they provide numerous ways to use basic and advanced image composition techniques. The greatest downside of straight up shots is that they are largely dependent on the immediate surroundings of a photographer.
4. Shoot from the height of your hip
Holding your iPhone at the height of your hip is another simple and effective way to find an angle that offers a unique perspective of the scene. Shooting from the hip is especially useful if you want to use your iPhone for Street photography because it makes the act of taking a photo much less obvious. Spontaneity is probably the most important aspect of street photography, and if nobody realizes you are taking pictures, the photos will look more candid.
Framing might a bit more complicated since you can’t really look at your display while you are taking a picture but if you use this type of a shot frequently your ability to create perfectly framed photos without even looking will improve significantly.
5. Bird’s Eye View
Image resource: Google
Looking down on a beautiful view impresses everyone, but putting yourself in a position to watch the world from a top of a mountain or even a building requires a certain level of preparation. However, a bird’s eye view angle can be captured on any location, and you just need to place yourself above the subject of your photo. This type of shot can be used for portraits, areal shots, and even breathtaking landscapes, but all objects depicted in bird’s eye view photos will appear smaller than they actually are.
Stairwells or even chairs can be used to take a high vantage point, but you must also make sure that your iPhone is perfectly stable and avoid camera shakes at any cost.
6. Use a Frame Within a Frame
Image resource: Chris Utano Photography
All photos have a rectangular shape, and depicting the same shape within a photo creates instant dynamics between the shape you captured in a photo and its literal shape. A frame can be literally anything from a window in your room to a crack in the wall or even an old photo frame, and each item you use as a frame will give the photo a special atmosphere.
Even though frames are an incredibly fun way to create photos, they obstruct the view of the spectator which is why figuring out how to incorporate a frame into the composition of your shot may take some patience and practice.
7. Use Transparent Objects as Lens Filters
Image resource: Digital Photo Secrets
You don’t have to know anything about camera lens filters in order to use them. Your sunglasses, glasses of water or any other transparent or reflecting surface can be used as a filter through which you take pictures.
If you take a photo through a glass of water you’ll be able to create a distorted image of the view behind the glass. Taking photos through transparent objects can be a lot of fun, but it is often more complicated than it seems. Controlling aperture, exposure or focus manually from your iPhone may help you get better results because you’ll be able to decide where the focal point of the photo will be or fine-tune the amount of light your iPhone camera can pick up.
Ollie Mattison
Ollie Mattison is a writer and a lover of all things video.
Follow @Ollie Mattison
- Title: 2024 Approved The Ultimate Guide to iPhone Composition Choosing Right Angles
- Author: Mark
- Created at : 2024-08-21 18:51:16
- Updated at : 2024-08-22 18:51:16
- Link: https://some-guidance.techidaily.com/2024-approved-the-ultimate-guide-to-iphone-composition-choosing-right-angles/
- License: This work is licensed under CC BY-NC-SA 4.0.